


Form 190 User Manual
1. Overview
- Form 190 is submitted under Rule 331 of the Income-tax Rules, 2026 by a Mutual Fund that intends to raise capital from the public through equity shares or debentures.
- This form must be filed at least three months before the proposed issue and acts as a compliance requirement to ensure that only eligible entities raise funds.
- Along with Form 190, the company must also provide supporting documents such as its Certificate of Incorporation under the Companies Act, 2013, and its audited financial statements (Balance Sheet and Profit & Loss account) for the last three years or since incorporation, whichever is shorter
2. Prerequisites for availing this service
- Taxpayer is registered at e-filing portal.
- Taxpayer has valid Username (PAN) and Password of E-filing 2.0 portal
- Status of PAN of the Taxpayer is “Active” as per PAN database
- Taxpayers should have a valid DSC. It should be registered at e-filing portal & not expired.
3.1 Purpose
3.2 Who can use it?
3.3 Form at a Glance
- Part A – Basic information
- Part B – Details of the trustees of the fund
- Part C – Details of scheme and Public issue
- Attachments
- Verification
4. Step-by-Step Guide
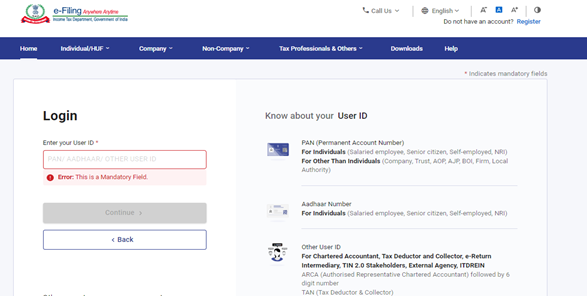
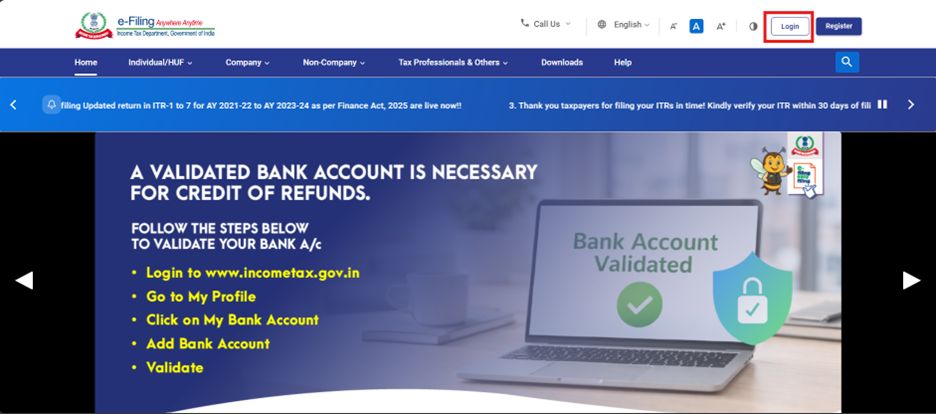 Step 2: Enter the User ID (PAN) and Password.
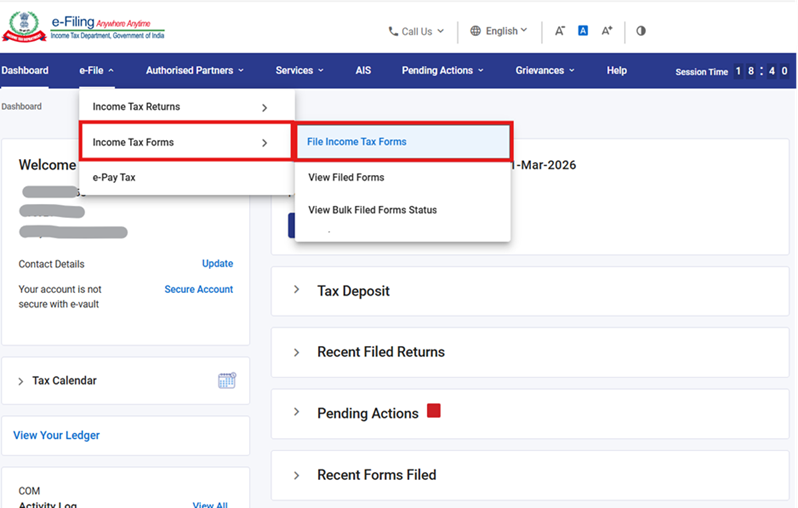
 Step 3: Go to e-file >Income Tax Forms > File Income Tax Forms.
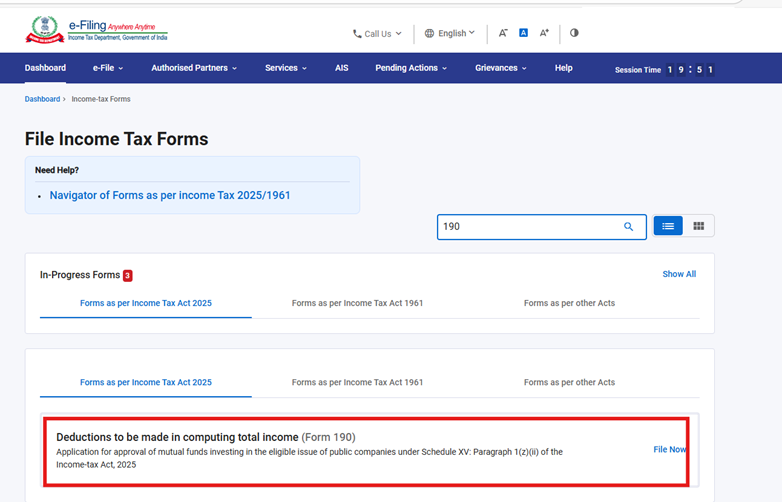
 Step 4: Under the Forms as per Income Tax Act 2025 tab, select Form 190 and click the File Now button.
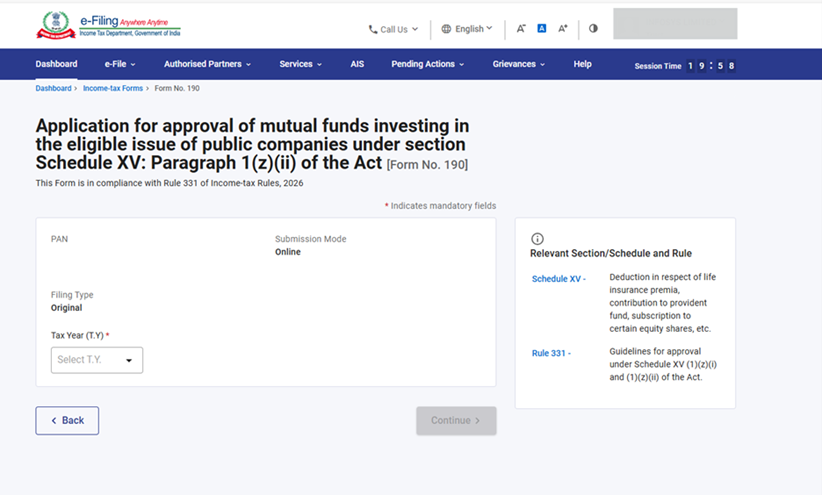
 Step 5: Check the PAN, Submission Mode, Filing Type and Select the applicable Tax Year (T.Y) and click on Continue button.
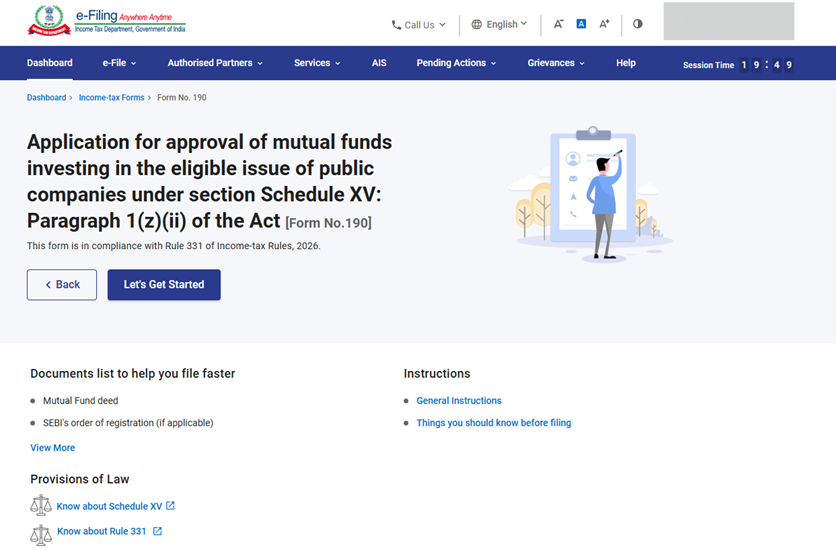
 Step 6: Click on Let’s Get Started.
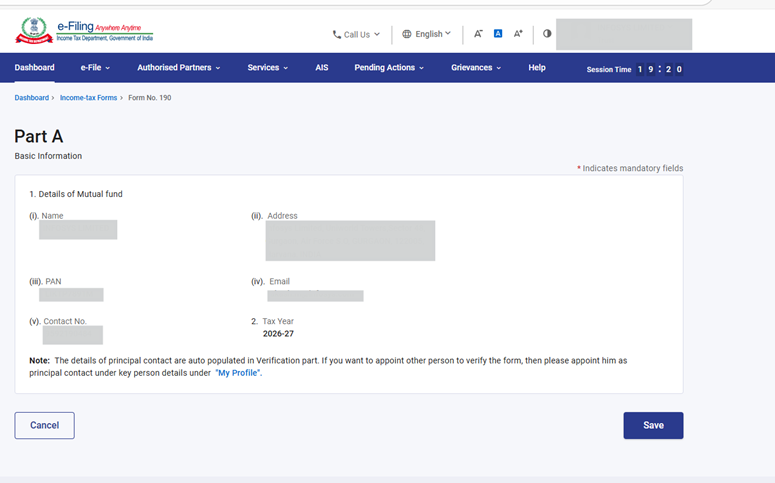
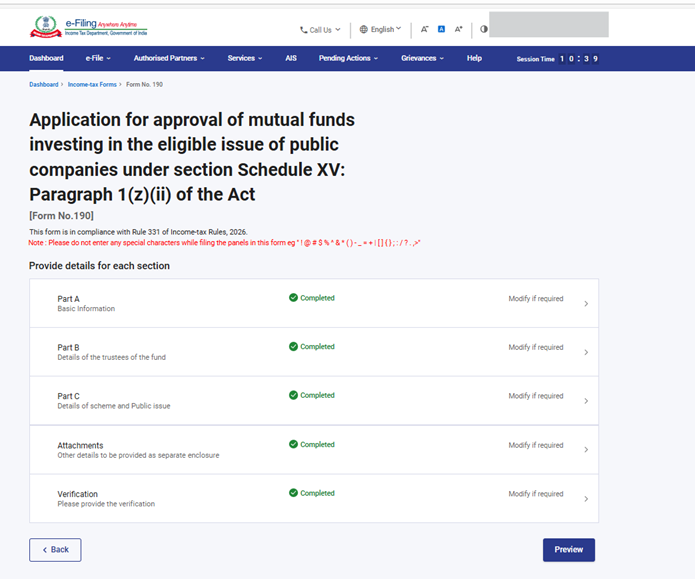
 Step 7: Post clicking on Let’s Get Started screen, user will be navigated to Panel screen and Select the 1st Panel: Part A – Basic Information . Verify the Particulars and click on Save.
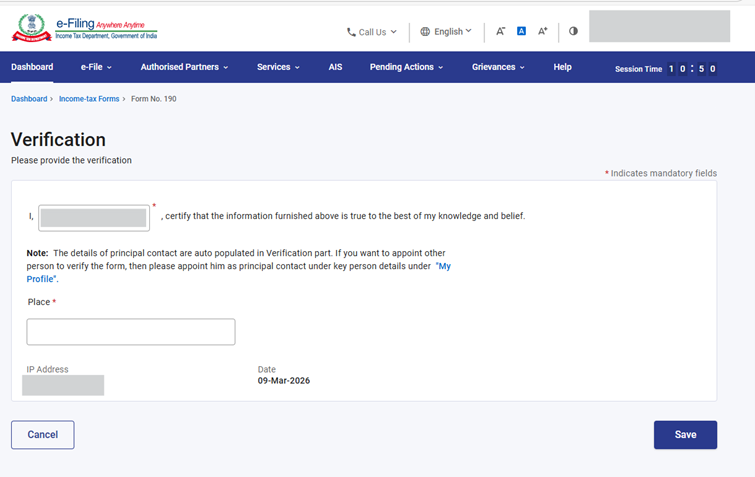
Note: Please ensure that all mandatory details under “My Profile” section including address is completed. You can update your contact and address details by clicking on hyperlink “My Profile”.
 Note:-
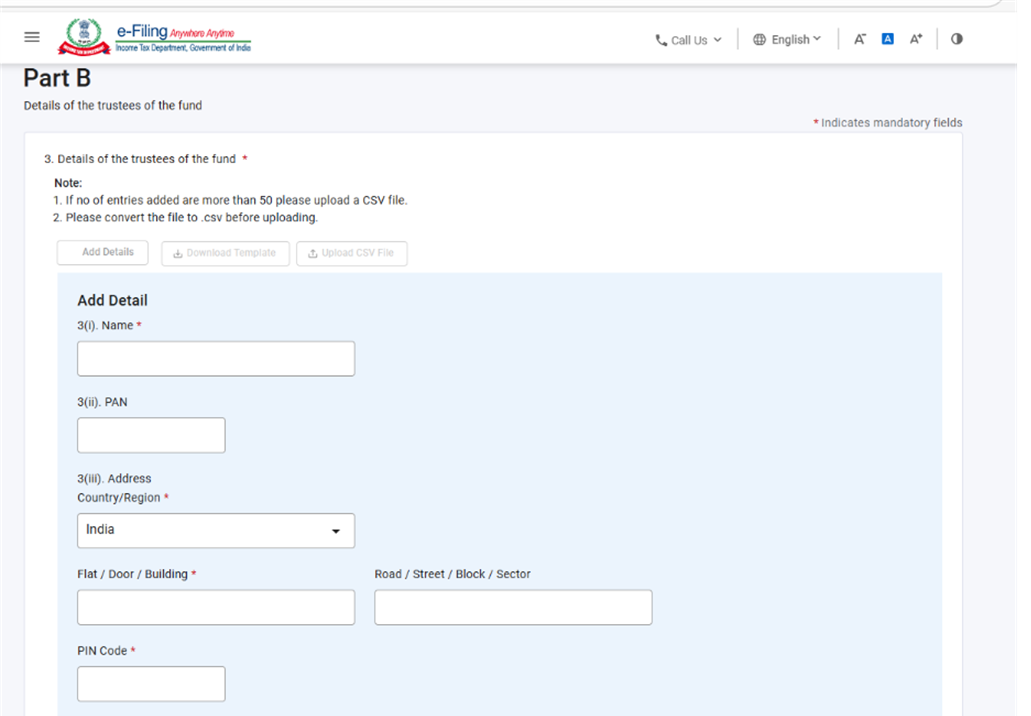
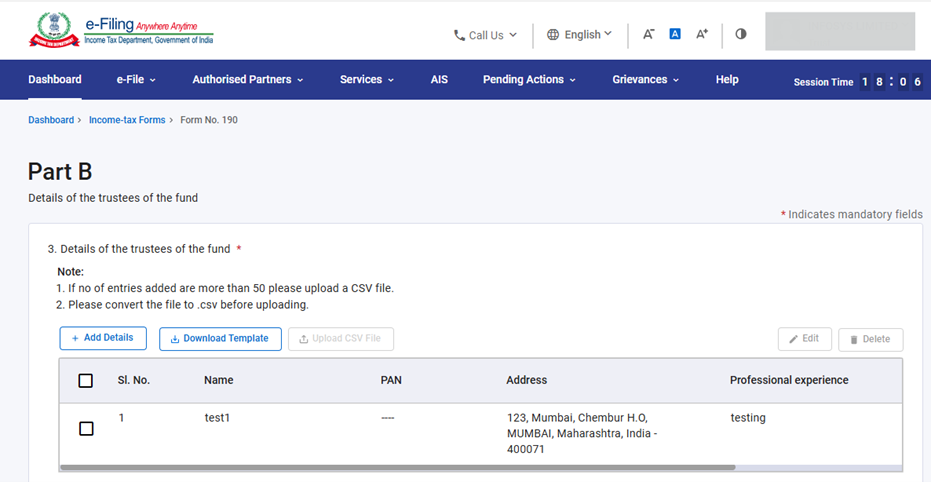
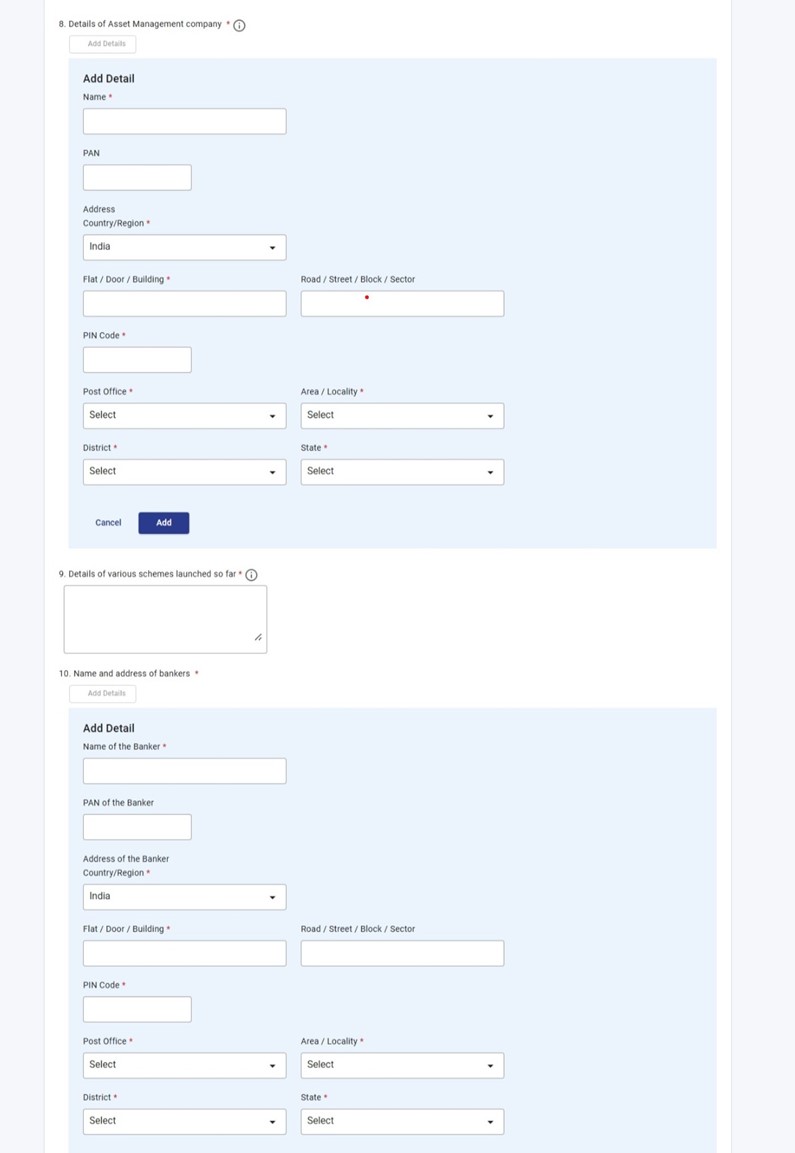
- The details entered under Serial No. 3 will be reflected in a table once added. User can add up to 50 records by clicking on “Add Details” button.
- If you want to enter more than 50 records in field no. 3, then you should download the excel template, fill in the details, convert the excel file into .CSV format and upload the same.
- Users need to download the template after click on Download Template.
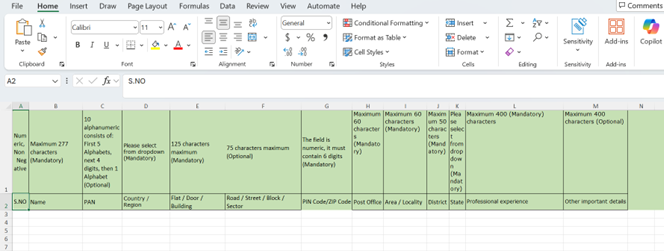
- After clicking the ‘Download Template’ button, an Excel file will be downloaded. In 1st row of excel template instructions are provided for entering data in excel. In 2nd row the user needs to fill in the data accordingly. Please prepare CSV as per instruction provided in the template.
- Please convert the file to .csv before uploading.
- After filling in the downloaded excel template, save the data in the excel template. Then click File > Save As or Alt+F+A. Select the ‘CSV (Comma delimited)’ from the drop down in Save as type and then click Save. The filled in excel file will be saved in CSV format. This CSV format needs to be uploaded on the portal.
- Follow the below mentioned instructions to fill in the above excel template.
| Field Name | Instruction | Mandatory field (Yes/No) | Length of the character |
| Serial No. | Enter the serial Number | yes | Numeric, NonNegative |
| Name | Enter Name of the Trustee | Yes | Max 277 Characters |
| PAN | Enter PAN of the Trustee | No | 10 alphanumeric consists of: First 5 Alphabets, next 4 digits, then 1 Alphabet |
| Country / Region | Enter country. | Yes | Please select from dropdown |
| Flat / Door / Building | Enter the Flat/ Door/ Building | Yes | 125 characters maximum |
| Road / Street / Block / Sector | Enter the Road / Street / Block / | No | 75 characters maximum |
| PIN Code/ZIP Code | Enter valid Pincode | Yes | The field is numeric, it must contain 6 digits |
| Post Office | Enter the post office of the relevant pincode |
Yes | 60 characters maximum |
| Area / Locality | Enter the Area/ Locality | Yes | 60 characters maximum |
| District | Enter the District | Yes | 50 characters maximum |
| State | Enter the State. | Yes | Please select from dropdown |
| Professional experience | Enter Professional experience | Yes | Maximum 400 characters |
| Other important details | Other important details | No | Maximum 400 characters |
 Note:-
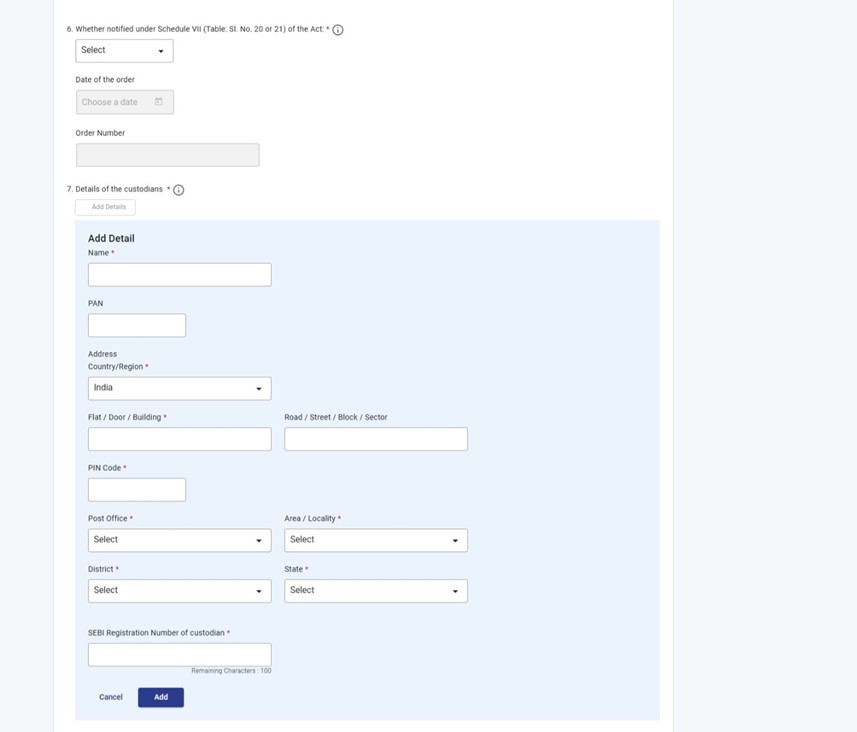
 Under Serial No. 7 Details of custodian, select ‘Add Details’, fill the required fields, and click ‘Add’ to proceed.
 Under Serial No. 10 Name and address of bankers, select ‘Add Details’, fill the required fields, and click ‘Add’ to proceed.
 Under Serial No. 11 Name and address of Auditors, select ‘Add Details’, fill the required fields, and click ‘Add’ to proceed.
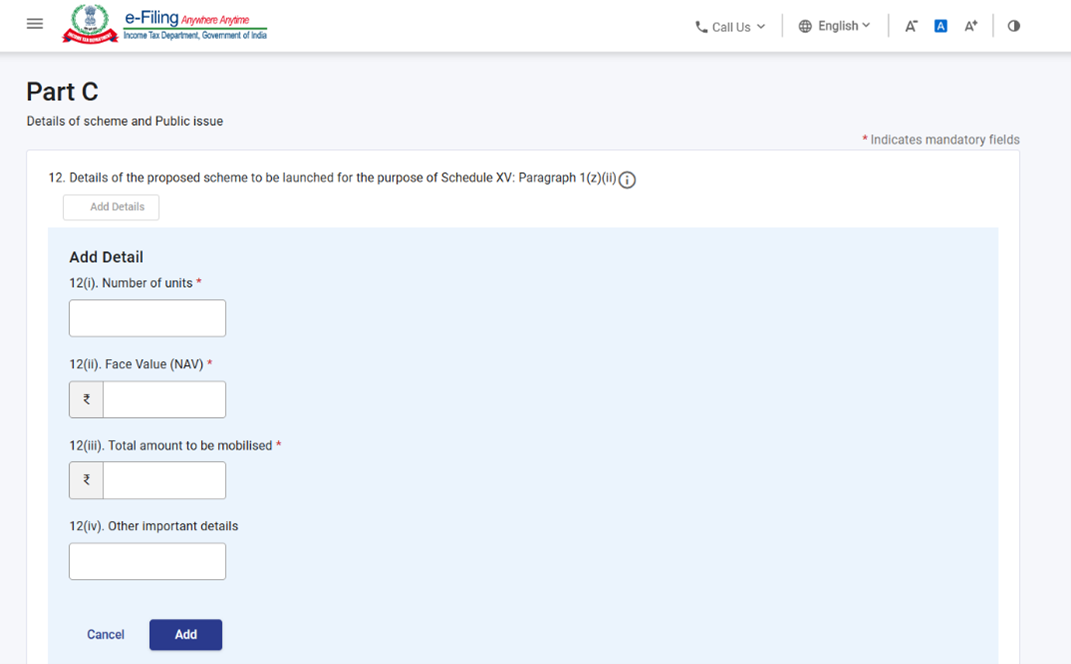
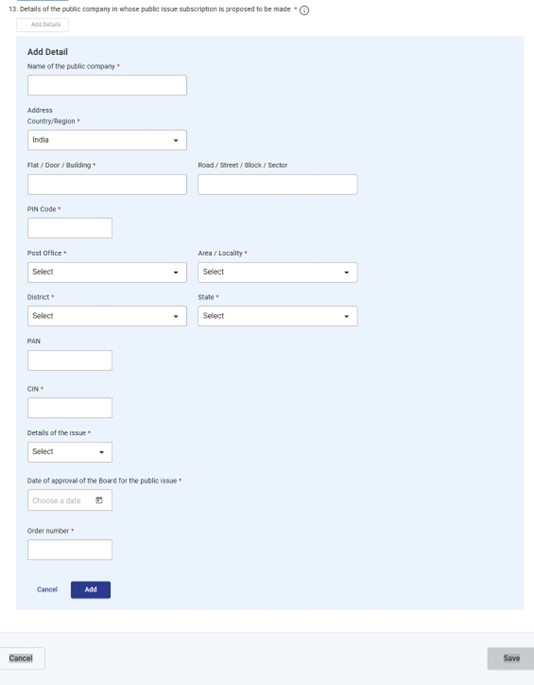
 Step 9: Post saving the 2nd panel, select the 3rd Panel: Part C -Details of Scheme and public issue. Please fill and verify the “Part C” panel and click on Save.
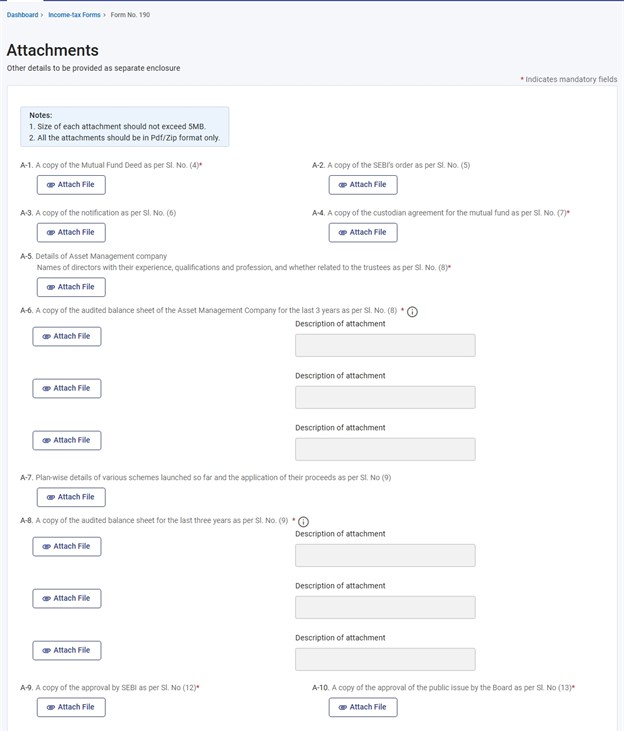
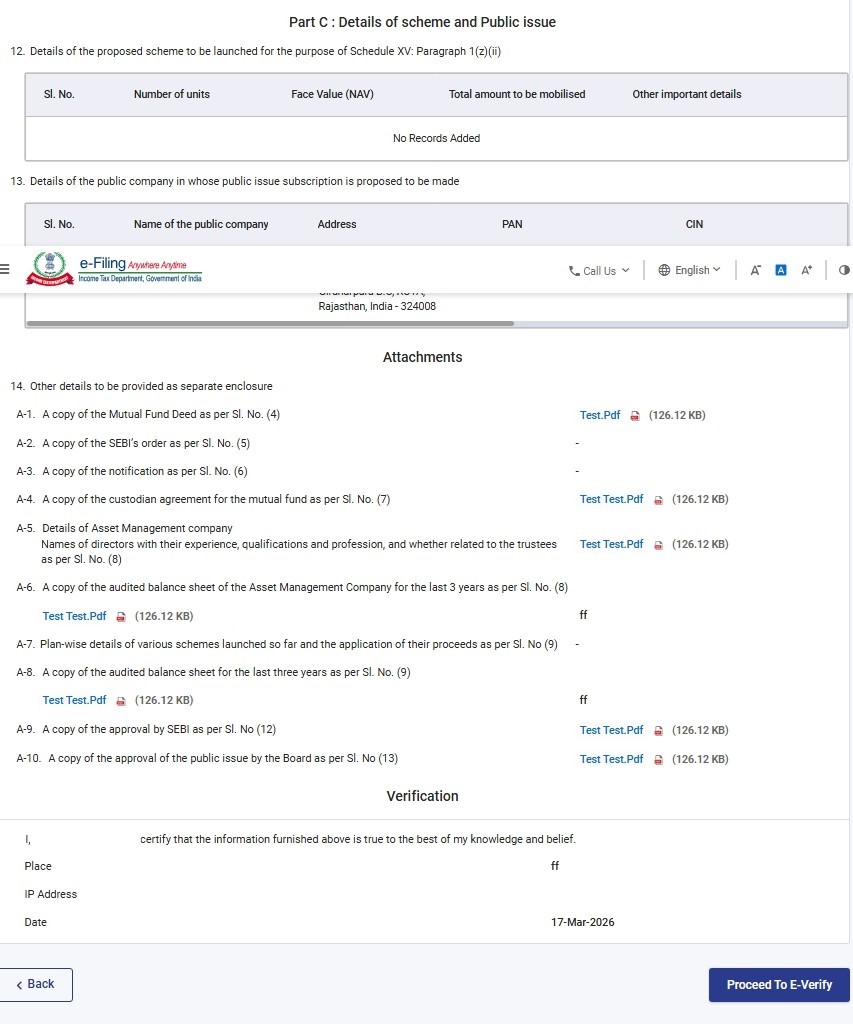
 Step 10: Post saving the 3rd panel, select the 4th Panel: Attachments. Please attach the relevant documents and click on Save.
- In Attachment A 6 and A-8, if the user uploads any file, the description text box becomes mandatory.
- In Attachment A-2 becomes mandatory if user selects “Yes” in field no 5.
- In Attachment A-3 becomes mandatory if user selects “Yes” in field no 6.
 Step 11: Post saving the 3rd panel, select the “Verification” Panel.
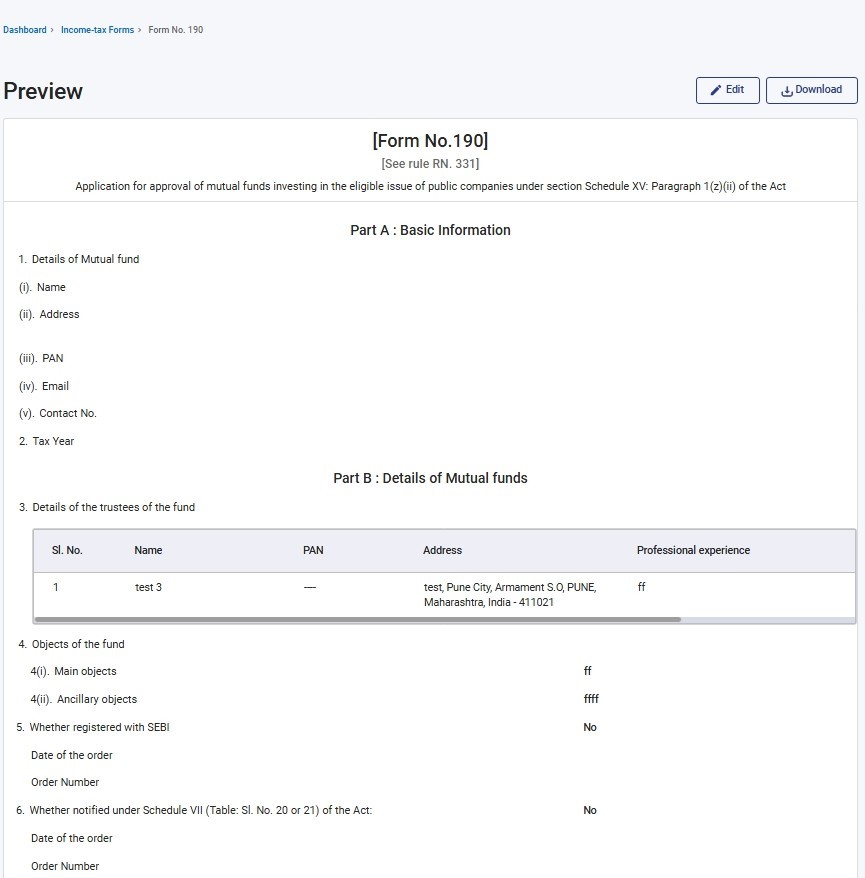
 Step 13: On the Preview page, verify the details and click Proceed to e-Verify.
Note: By clicking the “Download” button, the user can download the preview PDF and verify the details before proceeding with e verification.
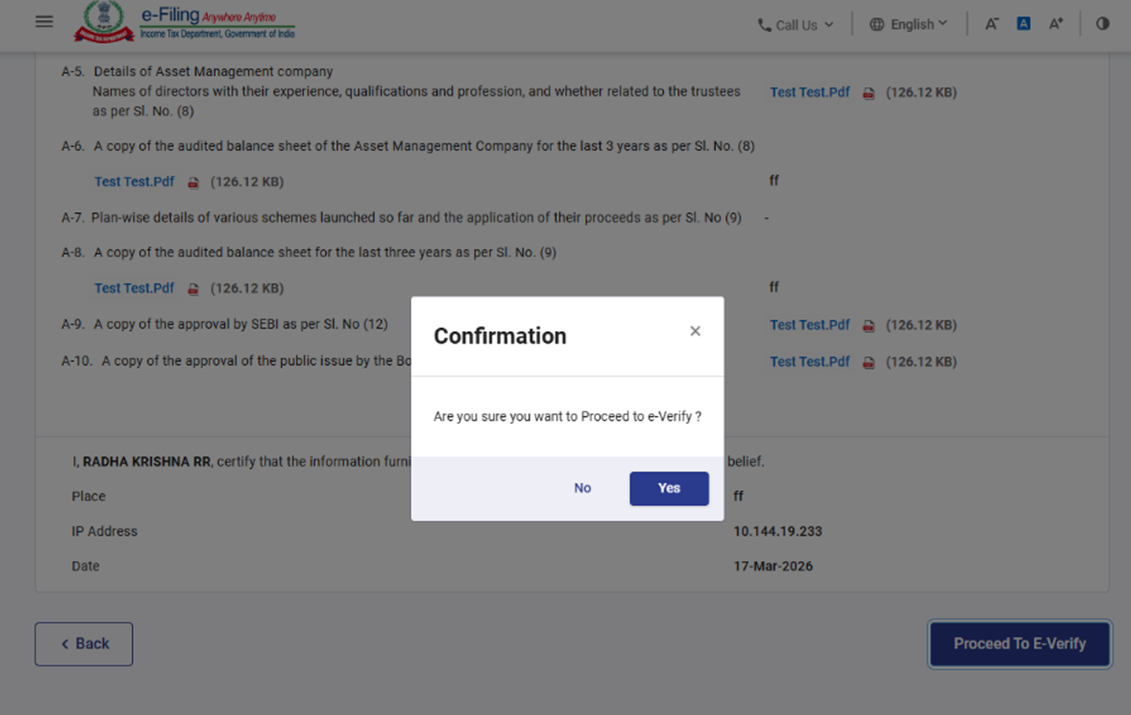
 Step 14: Post clicking on Proceed to e-Verify button, a popup confirmation displaying that you would like to proceed to e-Verify. Click on Yes.
 Step 15: On clicking Yes, you will be navigated to the E-Verify page where you can verify the Form 190 using DSC/EVC(as applicable).
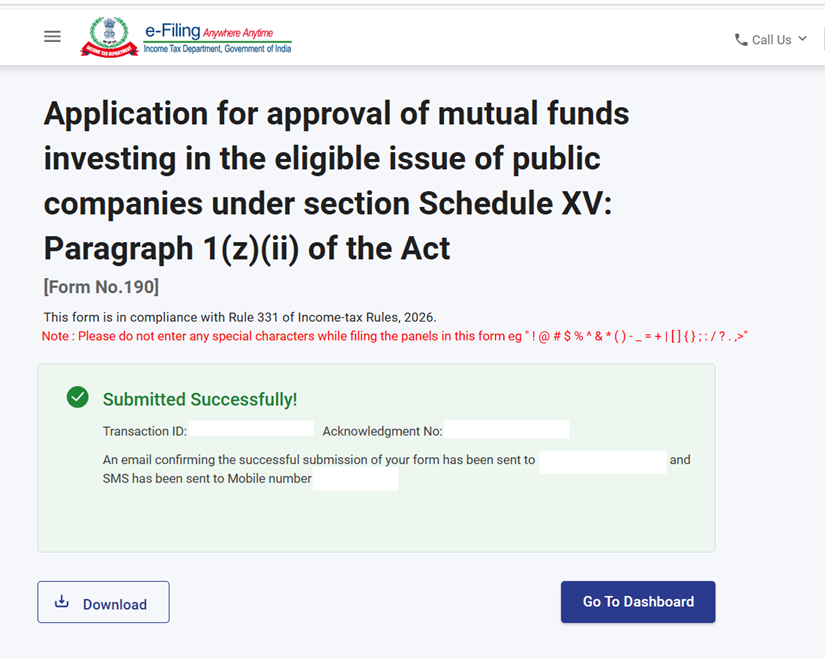 Note:
Note:
- After successful submission of form 190 the user can view the filled form under – On your Dashboard, click e-File > File Income Tax Forms > View Filed Forms> View Filed Form tab under Income Tax Act 2025.
- Refer view filled form user manual to learn more.
5. Related Topics
6. Glossary
| Acronym/Abbreviation | Description/Full Form |
|---|---|
| DSC | Digital Signature Certificate |
| EVC | Electronic Verification Certificate |
| ARN | Acknowledgement Receipt Number |
| PY | Previous Year |
| FY | Financial Year |
| TY | Tax Year |